zhangguanzhang's Blog

ubuntu preseed无人应答安装

字数统计: 2.5k阅读时长: 12 min
2019/08/06

之前的centos自动安装整得差不多了,今天有空研究下ubuntu的自动应答安装,过程是按照我遇到的问题的时间线的角度来描述,并不是总结后正确的开始姿势。
kickstart是red hat开发的。ubuntu的安装界面是一个debian-installer的二进制文件进程运行tty1提供的选择交互安装界面:
menu.jpg

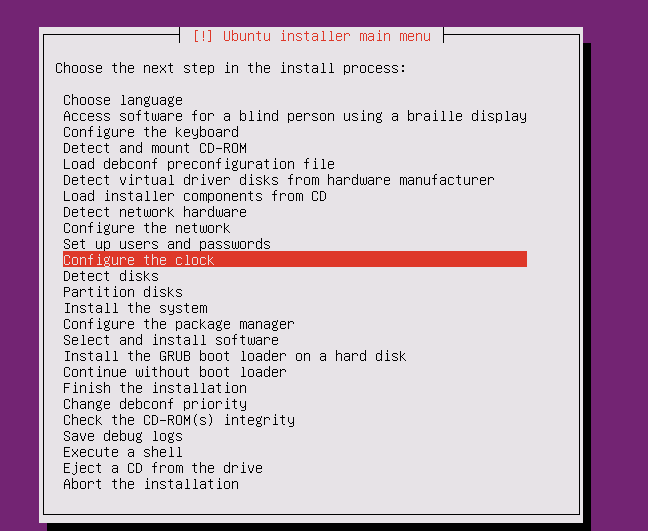
ubuntu自带的应答是preseed,相关文档页面是 https://help.ubuntu.com/lts/installation-guide/amd64/apb.html
实际上安装完成后我们可以安装debconf-utils后使用debconf-get-selections –installer导出preseed信息,但是这个信息比较乱,一般都是仅供参考

要想自动应答的话,我们可以从模板文件找起,实际上菜单的交互都是存在模板里,ubuntu的各个系统下路径名会不一样,但是都会在/var/log/目录里的,我们可以先安装一台,然后进去系统后使用下面命令查找

1
2
3
4
5
6
find /var  -not \( -path /proc -prune \) -not \(  -path /var/lib/docker -prune \)  -type f -name '*.dat'
/var/log/installer/cdebconf/templates.dat
/var/log/installer/cdebconf/questions.dat
/var/cache/debconf/config.dat
/var/cache/debconf/templates.dat
/var/cache/debconf/passwords.dat

templates.dat是模板,而questions里有很多字段和变量都是填充到模板显示出来到界面的,例如下面是选择安装菜单后的第一个选项
first.jpg

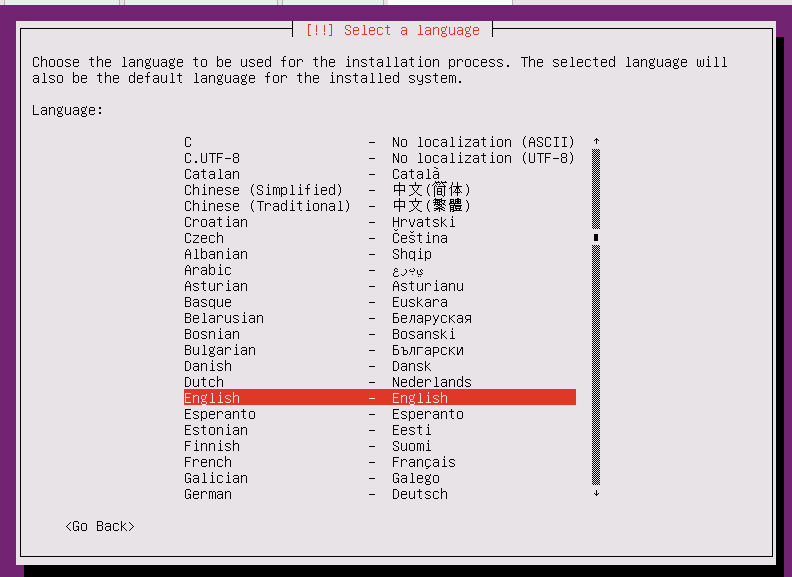
我们可以去查找关键字,当然不能去按照English查找,毕竟这个单词出现频率太高了,我们用上面的No localization,实际上我们在templates里找不到,所以我们在question里找

1
2
3
4
5
6
7
8
9
10
/var/log/installer/cdebconf#  grep -B8 -w 'No localization' questions.dat 

Name: localechooser/languagelist
Template: localechooser/languagelist
Value: en
Owners: d-i
Variables:
CODES = C, C.UTF-8, ca, zh_CN, zh_TW, hr, cs, sq, ar, ast, eu, be, bs, bg, da, nl, en, eo, et, fi, fr, gl, de, el, he, hu, is, id, ga, it, ja, kk, ko, ku, lv, lt, mk, se_NO, nb_NO, nn_NO, fa, pl, pt, pt_BR, ro, ru, sr, sk, sl, es, sv, tl, tg, th, tr, uk, ug, vi, cy
NAMES_EN = C, C.UTF-8, Catalan, Chinese (Simplified), Chinese (Traditional), Croatian, Czech, Albanian, Arabic, Asturian, Basque, Belarusian, Bosnian, Bulgarian, Danish, Dutch, English, Esperanto, Estonian, Finnish, French, Galician, German, Greek, Hebrew, Hungarian, Icelandic, Indonesian, Irish, Italian, Japanese, Kazakh, Korean, Kurdish, Latvian, Lithuanian, Macedonian, Northern Sami, Norwegian Bokmaal, Norwegian Nynorsk, Persian, Polish, Portuguese, Portuguese (Brazil), Romanian, Russian, Serbian (Cyrillic), Slovak, Slovenian, Spanish, Swedish, Tagalog, Tajik, Thai, Turkish, Ukrainian, Uyghur, Vietnamese, Welsh
NAMES_BOTH = C${!TAB}-${!TAB}No localization (ASCII), C.UTF-8${!TAB}-${!TAB}No localization .....

我们按照name localechooser/languagelist在template查找,可以发现变量都是存question里的,${NAMES_EN}${CODES}

1
2
3
4
5
6
7
8
9
10
/var/log/installer/cdebconf#  grep -A8 -P localechooser/languagelist templates.dat
Name: localechooser/languagelist
Type: select
Default: en
Choices: ${NAMES_EN}
Description: Language:
Extended_description: Choose the language to be used for the installation process. The selected language will also be the default language for the installed system.
Choices-C: ${CODES}
Choices-en.UTF-8: ${NAMES_BOTH}

Choices-C对应的值是缩写,不一定得使用Choices的值,所以我们选择英文可以写下面的语法来自动应答

1
d-i localechooser/languagelist  select en

这个是apt系列系统的preseed写法,写法规则如下:

1
<owner> <question name> <question type> <value>

每个字段之间只能一个空格或者制表符,多余的会被解释为该值,通过反斜杠可以作为行继续符号,有的value不止一个单词,有很多单词组成。另外owner大多数都是debian-installer,直接写d-i即可,而为<question type>下面这些

1
2
3
4
5
6
7
8
9
10
11
12
13
/var/log/installer/cdebconf#  grep -P '^Type' templates.dat | sort -ru
Type: title
Type: text
Type: terminal
Type: string
Type: select
Type: password
Type: note
Type: multiselect
Type: error
Type: entropy
Type: detect-keyboard
Type: boolean

更多讲解见官方文档
https://help.ubuntu.com/lts/installation-guide/amd64/apbs04.html
这里我主要介绍几个坑

1
append  file=/cdrom/preseed/ubuntu-server.seed vga=788 initrd=/install/initrd.gz quiet ---

上面是官方isolinux/txt.cfg里默认的启动参数,默认使用了自带的preseed文件,可以自己修改弄进去替换啥的。我考虑到后续放web上,直接web下载,所以我自己起了个nginx放nginx上,还可以预防每次改了preseed还得打包镜像。
搜索了相关资料可以缩写

alias full name
priority debconf/priority
fb debian-installer/framebuffer
language debian-installer/language
country debian-installer/country
locale debian-installer/locale
theme debian-installer/theme
auto auto-install/enable
classes auto-install/classes
file preseed/file
url preseed/url
domain netcfg/get_domain
hostname netcfg/get_hostname
interface netcfg/choose_interface
protocol mirror/protocol
suite mirror/suite
modules anna/choose_modules
recommends base-installer/install-recommends
tasks tasksel:tasksel/first
desktop tasksel:tasksel/desktop
dmraid disk-detect/dmraid/enable
keymap keyboard-configuration/xkb-keymap
preseed-md5 preseed/file/checksum

所以我改成了这样,preseed还支持放tftp和ftp上,例如preseed/url=tftp://host/path/to/preseed.cfgpreseed/url=ftp://host/path/to/preseed.cfg

1
append  url=http://xxxxx/test.seed vga=788 initrd=/install/initrd.gz quiet ---

结果测试了下压根没跳过,查看nginx的日志页压根没有人请求test.seed文件,后来查阅资料才发现是少了几个选项,必须加上了才行,最终的参数为

1
append  auto=true priority=critical url=http://xxxxx/test.seed vga=788 initrd=/install/initrd.gz quiet ---

上面列出的表格里也能在append后面写了,这样不用全部写在preseed里了。然后后面写到了时区那,测试了却没有自动应答

1
2
d-i localechooser/continentlist select Asia
d-i localechooser/countrylist/Asia select China

然后搜索资料在 https://bugs.debian.org/cgi-bin/bugreport.cgi?bug=503189 找到解决方法,在append后或者最开始加下面的设置成en_US才行

1
d-i debian-installer/locale string en_US.UTF-8

最后简单介绍下一些技巧
安装之前执行的一些命令

1
d-i partman/early_command string xxx

例如我们可以指定安装的硬盘盒boot安装的硬盘排除usb,其中的list-devices disk可以列出硬盘设备

1
2
3
4
5
6
d-i partman/early_command string \
USBDEV_LIST="$(mktemp)"; \
list-devices usb-partition | sed "s/\(.*\)./\1/" > "$USBDEV_LIST"; \
BOOTDEV="$(list-devices disk | grep -vf "$USBDEV_LIST" | head -n 1)"; \
debconf-set partman-auto/disk "$BOOTDEV"; \
debconf-set grub-installer/bootdev "$BOOTDEV";

不创建用户,并且允许root用户tty登陆,允许弱密码

1
2
3
d-i passwd/make-user boolean false
d-i passwd/root-login boolean true
d-i user-setup/allow-password-weak boolean true

分区的话网上的博客说得非常少,这里不说lvm和raid,只说正常的分区

1
2
3
4
d-i partman-auto/method string regular  # 值为 regular lvm crypto(带lvm的加密),这里我用常规
d-i partman-auto/disk string /dev/sda # 可以上面的early_command也可以这里指定默认安装的硬盘
d-i partman/confirm_nooverwrite boolean true # 不强制清理已有分区
d-i partman/default_filesystem string ext4 # 设置默认文件系统
1
2
3
4
5
6
7
8
9
10
11
12
13
14
15
16
17
d-i partman-auto/choose_recipe select boot-root # 选择名为boot-root的方案
d-i partman-auto/expert_recipe string \
boot-root :: \
40 50 100 ext3 \
$primary{ } $bootable{ } \
method{ format } format{ } \
use_filesystem{ } filesystem{ ext3 } \
mountpoint{ /boot } \
. \
500 10000 1000000000 ext3 \
method{ format } format{ } \
use_filesystem{ } filesystem{ ext3 } \
mountpoint{ / } \
. \
64 512 300% linux-swap \
method{ swap } format{ } \
.

上面第二行是声明一个名为boot-root的方案,对应上面的选择,其中.隔开每个分区,例如

1
3000 5000 8000 ext3 $primary{ } $bootable{ } method{ format } format{ } use_filesystem{ } filesystem{ ext3 } mountpoint{ / }
  • 3000:分区的最小尺寸
  • 5000:优先级,越小优先级越高,如果它和其他列出的分区争夺磁盘空间(这与其他分区的优先级进行比较)
  • 8000:mb的最大分区大小(80GB;这是80GB磁盘。), -1使用剩下容量
  • ext3:文件系统类型,其他的有btrfs,efi,ext2,ext3,ext4,jfs,linux-swap,fat32,free,,nfts,xfs
  • $primary{ }: 主分区
  • $bootable{ }: 这是一个可启动的分区
  • method {format}:设置为format则会格式化分区,值为keep的话不格式化,swap则是swap分区
  • format{ }: 没有详细的说明,通常看到都是为空
  • use_filesystem{ }: 使用文件系统
  • filesystem{ ext3 }: 文件系统类型,如果是swap则不需要这整个字段,另外这里吐槽下ubuntu,数字那行就写了文件系统,这里还多此一举
  • mountpoint{ / }: 挂载点
  • device{ /dev/sda }: 假设另一块儿盘当作数据目录可以用这个标签

写得少的话我在虚机里测试可以,注意别写错容量,否则默认会只生成一个根分区

1
2
3
4
5
6
7
8
9
10
11
12
13
14
15
16
17
18
19
20
21
22
23
24
25

d-i partman-auto/disk string /dev/sda
d-i partman-auto/choose_recipe select boot-root
d-i partman-auto/method string regular
d-i partman-lvm/device_remove_lvm boolean true
d-i partman-md/device_remove_md boolean true
d-i partman-auto/expert_recipe string \
boot-root :: \
100 50 200 ext3 \
$primary{ } $bootable{ } \
method{ format } format{ } \
use_filesystem{ } filesystem{ ext3 } \
mountpoint{ /boot } \
. \
180000 10000 -1 ext4 \
method{ format } format{ } \
use_filesystem{ } filesystem{ ext4 } \
mountpoint{ / } \
.
d-i partman-partitioning/confirm_write_new_label boolean true
d-i partman/choose_partition select finish
d-i partman/confirm boolean true
d-i partman/confirm_nooverwrite boolean true
d-i partman/default_filesystem string ext4
d-i partman/mount_style select uuid

最后放下我vmware里ubuntu用的完整preseed

1
2
3
4
5
6
7
8
9
10
11
12
13
14
15
16
17
18
19
20
21
22
23
24
25
26
27
28
29
30
31
32
33
34
35
36
37
38
39
40
41
42
43
44
45
46
47
48
49
50
51
52
53
54
55
56
57
58
59
60
61
62
63
64
65
66
67
68
69
70
71
72
73
74
75
76
d-i auto-install/enable boolean true
d-i debconf/priority select critical

d-i debian-installer/locale string en_US.UTF-8

d-i localechooser/languagelist select en
d-i localechooser/shortlist/en select US
d-i localechooser/continentlist select Asia
d-i localechooser/countrylist/Asia select China

d-i time/zone select Asia/Shanghai


d-i netcfg/hostname string zhangguanzhang

d-i passwd/root-login boolean true
d-i passwd/make-user boolean false
d-i passwd/root-password password r00tme
d-i passwd/root-password-again password r00tme

d-i user-setup/allow-password-weak boolean true


#d-i netcfg/get_ipaddress string 192.168.1.42
#d-i netcfg/get_netmask string 255.255.255.0
#d-i netcfg/get_gateway string 192.168.1.1
#d-i netcfg/get_nameservers string 192.168.1.1
#d-i netcfg/confirm_static boolean true


d-i partman-auto/disk string /dev/sda
d-i partman-auto/method string regular
d-i partman-basicfilesystems/no_swap boolean false
d-i partman-auto/expert_recipe string \
boot-root :: \
150 1 200 ext4 \
$primary{ } $bootable{ } \
method{ format } format{ } \
use_filesystem{ } filesystem{ ext4 } \
mountpoint{ /boot } . \
15000 2 -1 ext4 \
$primary{ } \
method{ format } format{ } \
use_filesystem{ } filesystem{ ext4 } \
mountpoint{ / } .
d-i partman-partitioning/confirm_write_new_label boolean true
d-i partman-auto/choose_recipe select boot-root
d-i partman/choose_partition select finish
d-i partman/confirm boolean true
d-i partman/confirm_nooverwrite boolean true
d-i partman/default_filesystem string ext4
d-i partman/mount_style select uuid

#d-i partman-md/device_remove_md boolean true
#d-i partman-md/confirm boolean true
#d-i partman-md/confirm_nooverwrite boolean true
#
#d-i partman-lvm/device_remove_lvm boolean true
#d-i partman-lvm/confirm boolean true
#d-i partman-lvm/confirm_nooverwrite boolean true
#


d-i pkgsel/include string openssh-server openssh-client


#d-i preseed/early_command string

d-i preseed/late_command string \
in-target sh -c 'sed -i "/#PermitRootLogin/a PermitRootLogin yes" /etc/ssh/sshd_config';


finish-install finish-install/keep-consoles boolean false
d-i finish-install/reboot_in_progress note

也可以去参考下下面的

https://github.com/core-process/linux-unattended-installation/blob/master/ubuntu/18.04/custom/preseed.cfg
https://phabricator.wikimedia.org/P7955
https://wikitech.wikimedia.org/wiki/PartMan

CATALOG