记录下这几天搭建的过程
jira-software 8.0.0
confluence 6.14.1
Docker CE 18.06.02
OS CentOS 7.5.1804
系统基本设置
1
2
3
systemctl disable --now firewalld NetworkManager setenforce 0 sed -ri '/^[^#]*SELINUX=/s#=.+$#=disabled#' /etc/selinux/config
1
2
yum install -y wget net-tools git psmisc epel-release vim yum install -y jq bash-completion
建议升级下内核
mysql数据库安装 添加repo源 本次数据库采用mysql 5.7.2x
1 2 wget https://dev.mysql.com/get/mysql57-community-release-el7-11.noarch.rpm rpm -Uvh mysql57-community-release-el7-11.noarch.rpm
查看源里的版本
1 2 3 4 5 6 7 8 9 10 11 12 13 14 15 16 17 18 19 [root@jt-jira ~]# yum list mysql-community-server --showduplicates | sort -r * updates: mirrors.aliyun.com mysql-community-server.x86_64 5.7.9-1.el7 mysql57-community mysql-community-server.x86_64 5.7.25-1.el7 mysql57-community mysql-community-server.x86_64 5.7.24-1.el7 mysql57-community mysql-community-server.x86_64 5.7.23-1.el7 mysql57-community mysql-community-server.x86_64 5.7.22-1.el7 mysql57-community mysql-community-server.x86_64 5.7.21-1.el7 mysql57-community mysql-community-server.x86_64 5.7.20-1.el7 mysql57-community mysql-community-server.x86_64 5.7.19-1.el7 mysql57-community mysql-community-server.x86_64 5.7.18-1.el7 mysql57-community mysql-community-server.x86_64 5.7.17-1.el7 mysql57-community mysql-community-server.x86_64 5.7.16-1.el7 mysql57-community mysql-community-server.x86_64 5.7.15-1.el7 mysql57-community mysql-community-server.x86_64 5.7.14-1.el7 mysql57-community mysql-community-server.x86_64 5.7.13-1.el7 mysql57-community mysql-community-server.x86_64 5.7.12-1.el7 mysql57-community mysql-community-server.x86_64 5.7.11-1.el7 mysql57-community mysql-community-server.x86_64 5.7.10-1.el7 mysql57-community
安装 1 yum install -y mysql-community-server
安装完暂时不要启动
配置mysql的客户端连接选项和其余的客户端选项
1 2 3 4 5 6 7 8 9 cat>/etc/my.cnf.d/client.cnf<<EOF [client] default-character-set=utf8 EOF cat>/etc/my.cnf.d/mysql-clients.cnf<<EOF [mysql] default-character-set=utf8 EOF
jira数据库配置 mysql的my.cnf配置 官方的建议mysql的配置文件https://confluence.atlassian.com/adminjiraserver/connecting-jira-applications-to-mysql-5-7-966063305.html [mysqld]区域下
1 2 3 4 5 6 7 8 cat>>/etc/my.cnf<<EOF default-storage-engine=INNODB # 将默认存储引擎设置为InnoDB character_set_server=utf8mb4 # 指定数据库服务器使用的字符集 innodb_default_row_format=DYNAMIC # 将默认行格式设置为 DYNAMIC innodb_large_prefix=ON # 启用大前缀 innodb_file_format=Barracuda # 将InnoDB文件格式设置为Barracuda innodb_log_file_size=2G # innodb_log_file_size至少为2G EOF
确保sql_mode参数未指定NO_AUTO_VALUE_ON_ZERO,有的话删掉下面这行
1 sql_mode = NO_AUTO_VALUE_ON_ZERO #有的话删掉这行
mysql初始化和设置 启动mysql完成初始化
1 systemctl enable --now mysqld
初始化后可以通过看log来查找默认的root密码
1 2 [root@jt-jira ~]# grep 'temporary password' /var/log/mysqld.log 2019-02-18T09:07:42.064502Z 1 [Note] A temporary password is generated for root@localhost: E#xxxxxxx9Od
运行mysql_secure_installation完成基本设置和配置
1 2 3 4 5 6 7 8 9 10 11 12 13 14 15 16 17 18 19 20 21 22 23 24 25 26 27 28 29 30 31 32 33 34 35 36 37 38 39 40 41 42 43 44 45 46 47 48 49 50 51 52 53 54 55 56 57 58 [root@jt-jira ~]# mysql_secure_installation Securing the MySQL server deployment. Enter password for user root: <–初次运行输入log里的root密码 The existing password for the user account root has expired. Please set a new password. New password: <– 设置root用户的密码,复杂度不够可能会被再次要求输入 Re-enter new password: <– 再输入一次你设置的密码 The 'validate_password' plugin is installed on the server. The subsequent steps will run with the existing configuration of the plugin. Using existing password for root. Estimated strength of the password: 100 Change the password for root ? ((Press y|Y for Yes, any other key for No) : No <– 输入No,前面设置过root密码了 ... skipping. By default, a MySQL installation has an anonymous user, allowing anyone to log into MySQL without having to have a user account created for them. This is intended only for testing, and to make the installation go a bit smoother. You should remove them before moving into a production environment. Remove anonymous users? (Press y|Y for Yes, any other key for No) : y <– 是否删除匿名用户,输入y回车 Success. Normally, root should only be allowed to connect from 'localhost'. This ensures that someone cannot guess at the root password from the network. Disallow root login remotely? (Press y|Y for Yes, any other key for No) : y <–是否禁止root远程登录,看需求,如果开发用得多就不禁止,这里动得少我是直接禁止掉的 Success. By default, MySQL comes with a database named 'test' that anyone can access. This is also intended only for testing, and should be removed before moving into a production environment. Remove test database and access to it? (Press y|Y for Yes, any other key for No) : y <– 是否删除test数据库,输入y回车 - Dropping test database... Success. - Removing privileges on test database... Success. Reloading the privilege tables will ensure that all changes made so far will take effect immediately. Reload privilege tables now? (Press y|Y for Yes, any other key for No) : y 是否重新加载权限表,输入y回车 Success. All done!
删除log里的密码
1 sed -ri '/temporary password/d' /var/log/mysqld.log
创建jira的库和用户名和密码以及权限 1 2 3 4 mysql -uroot -p mysql> create database jira default character set utf8 collate utf8_bin; mysql> grant all on jira.* to 'jira'@'%' identified by 'v8xxxxxxx1';
安装docker
所有机器需要设定/etc/sysctl.d/docker.conf的系统参数。
1 2 3 4 5 6 7 cat <<EOF > /etc/sysctl.d/docker.conf net.ipv4.ip_forward = 1 net.bridge.bridge-nf-call-ip6tables = 1 net.bridge.bridge-nf-call-iptables = 1 fs.may_detach_mounts = 1 EOF sysctl --system
这里利用docker的官方安装脚本来安装一次来添加repo,然后安装docker版本,选择你要安装的docker版本即可
1 2 3 curl -fsSL "https://get.docker.com/" | bash -s -- --mirror Aliyun && yum autoremove docker-ce -y yum list docker-ce --showduplicates | sort -r yum install -y docker-ce-<VERSION STRING>
1 2 3 4 5 6 7 8 9 10 11 12 13 14 15 mkdir -p /etc/docker/cat >/etc/docker/daemon.json<<EOF { "registry-mirrors": ["https://fz5yth0r.mirror.aliyuncs.com"], "storage-driver": "overlay2", "storage-opts": [ "overlay2.override_kernel_check=true" ], "log-driver": "json-file", "log-opts": { "max-size": "100m", "max-file": "3" } } EOF
运行的话推荐使用docker-compose方便交接而不是命令行去docker run
1 2 sudo curl -L "https://github.com/docker/compose/releases/download/1.23.2/docker-compose-$(uname -s) -$(uname -m) " -o /usr/local/bin/docker-composechmod +x /usr/local/bin/docker-compose
设置docker开机启动,CentOS安装完成后docker需要手动设置docker命令补全:
1 2 cp /usr/share/bash-completion/completions/docker /etc/bash_completion.d/systemctl enable --now docker
jira部署 先说说jira的docker镜像这块
jira镜像改造过程说明 https://hub.docker.com/r/cptactionhank/atlassian-jira-software https://github.com/zhangguanzhang/Dockerfile/tree/master/atlassian-jira -Duser.timezone=GMT+08,分析了下启动过程发现如下步骤:
1 2 3 4 5 6 7 8 9 + '[' -r /opt/atlassian/jira/bin/setenv.sh ']' + . /opt/atlassian/jira/bin/setenv.sh $ cat /opt/atlassian/jira/bin/setenv.sh ... JAVA_OPTS="-Xms${JVM_MINIMUM_MEMORY} -Xmx${JVM_MAXIMUM_MEMORY} ${JVM_CODE_CACHE_ARGS} ${JAVA_OPTS} ${JVM_REQUIRED_ARGS} ${DISABLE_NOTIFICATIONS} ${JVM_SUPPORT_RECOMMENDED_ARGS} ${JVM_EXTRA_ARGS} ${JIRA_HOME_MINUSD} ${START_JIRA_JAVA_OPTS}" ... export JAVA_OPTS
所以我在Dockerfile里通过ENV设置了JAVA_OPTS=’-Duser.timezone=GMT+08’给最终运行的java主进程增加了选项和参数调整到正确的时区。而通过运行容器看到LANG已经被设置为C.UTF-8即可完美的支持中文不需要我们声明环境变量
1
2
[root@jt-jira jira]# docker exec jira sh -c 'echo $LANG' C.UTF-8
compose的yml为如下,因为主进程是java,所以用了init来运行tini,使用docker volume去存储数据和log
1 2 3 4 5 6 7 8 9 10 11 12 13 14 15 16 17 18 19 20 21 version: '3.7' services: jira: image: zhangguanzhang/atlassian-jira-software:8.0.0 container_name: jira hostname: jira init: true volumes: - JIRA_HOME_data:/var/atlassian/jira - JIRA_log_data:/opt/atlassian/jira/logs - /etc/localtime:/etc/localtime:ro ports: - '8080:8080' logging: driver: json-file options: max-file: '3' max-size: 100m volumes: JIRA_HOME_data: {} JIRA_log_data: {}
启动会要一段时间,可以浏览器访问ip:8080能访问了继续往下走
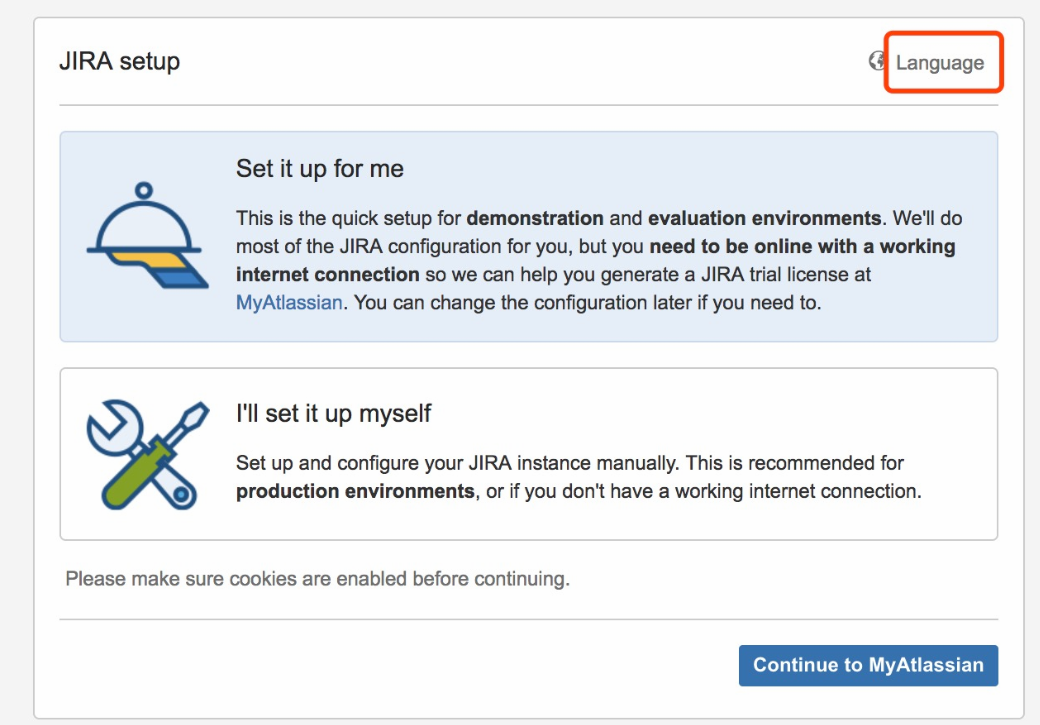
设置下语言切换成中文,选择自行配制
选择自己的数据库按照信息填写,填写主机的ip而不是localhost和127.0.0.1
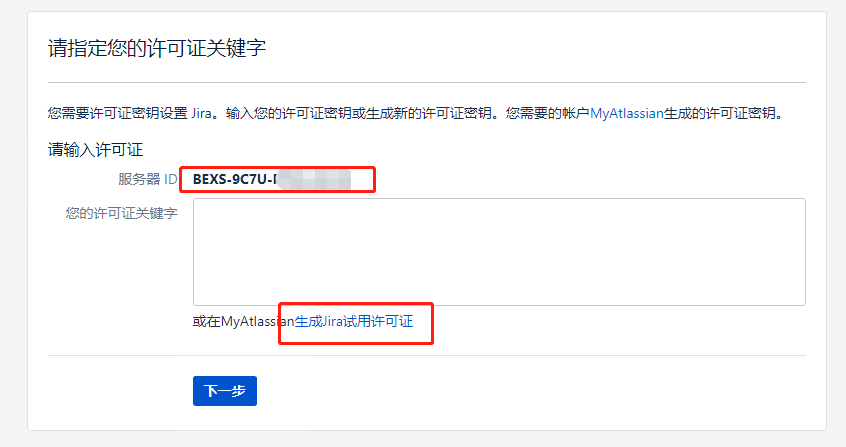
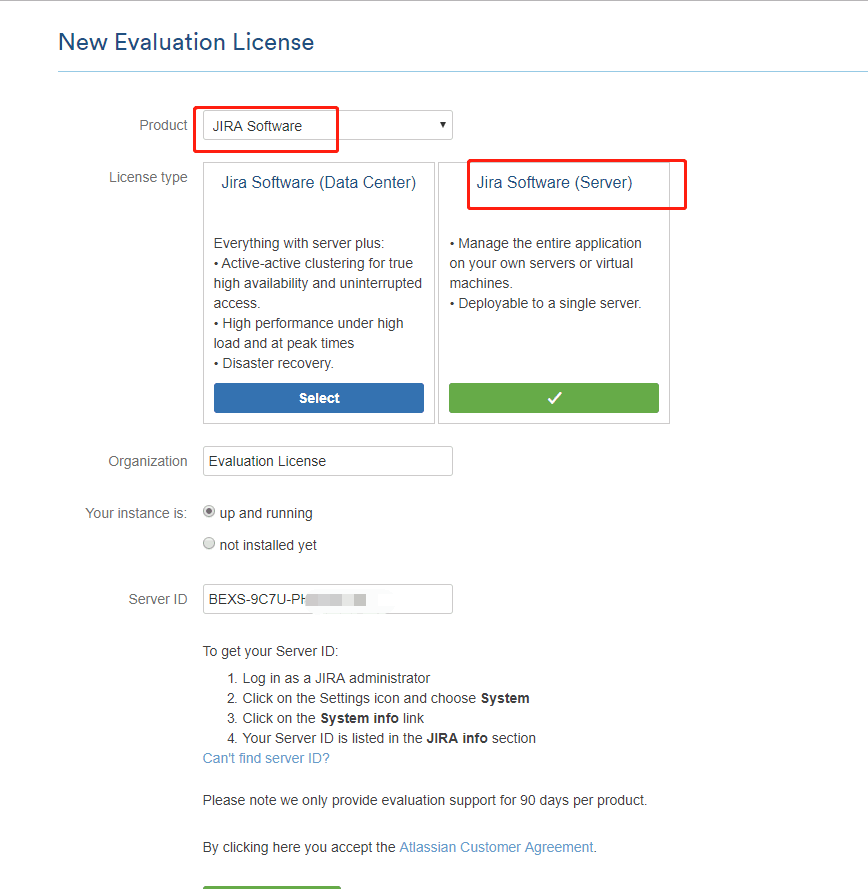
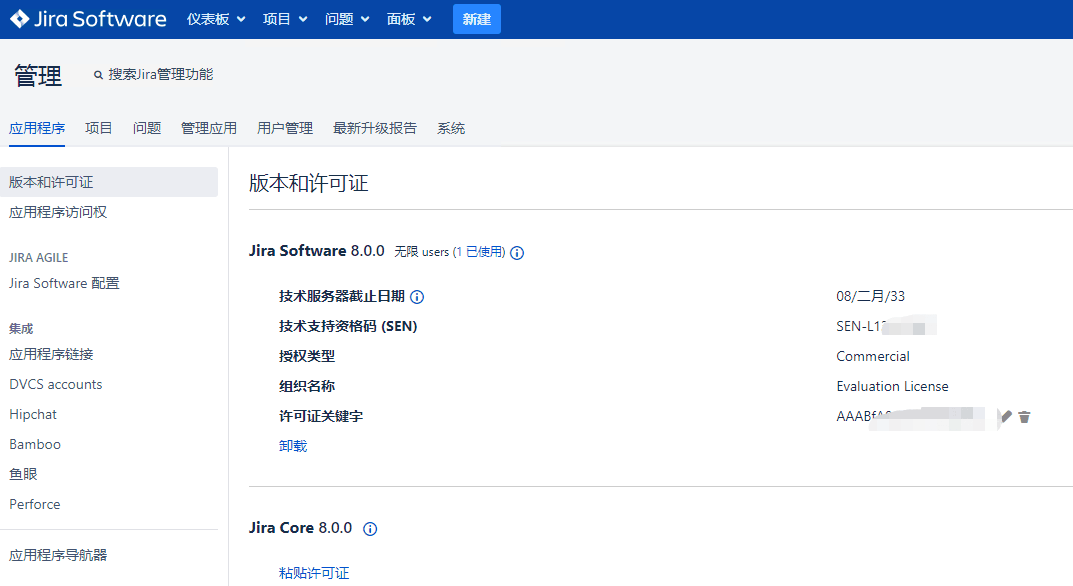
点击下面的蓝色超链接会跳转到使用许可证申请界面,如果内网的话右击蓝色复制链接地址在公网打开(需要梯子才能访问许可证申请页面)
后面启动完了会看到log一直刷SSL的错误需要修改数据库的连接配置加上&useSSL=false
1 2 3 4 [root@jt-jira jira]# cat /var/lib/docker/volumes/jira_JIRA_HOME_data/_data/dbconfig.xml ... <url>jdbc:mysql://address=(protocol=tcp)(host=10.20.4.38)(port=3306)/jira?sessionVariables=default_storage_engine=InnoDB</url> ...
右边的</url>改为&useSSL=false</url>
1 vim /var/lib/docker/volumes/jira_JIRA_HOME_data/_data/dbconfig.xml
confluence 数据库方面大致一样,不同在于my.cnf配置https://confluence.atlassian.com/doc/database-setup-for-mysql-128747.html
1 2 3 4 5 6 7 8 9 cat>>/etc/my.cnf<<EOF character-set-server=utf8 collation-server=utf8_bin # 将默认字符集指定为UTF-8 default-storage-engine=INNODB # 将默认存储引擎设置为InnoDB max_allowed_packet=256M # max_allowed_packet至少为256M innodb_log_file_size=2GB # innodb_log_file_size 至少为2GB transaction-isolation=READ-COMMITTED # 确保数据库的全局事务隔离级别已设置为READ-COMMITTED binlog_format=row # 检查二进制日志记录格式是否配置为使用“基于行”的二进制日志记录 EOF
确保sql_mode参数未指定NO_AUTO_VALUE_ON_ZERO,有的话删掉下面这行
1 sql_mode = NO_AUTO_VALUE_ON_ZERO #有的话删掉这行
启动数据库,然后和上面jira一样初始化
创建一个空的Confluence数据库模式(例如confluence):
1 CREATE DATABASE <database-name> CHARACTER SET utf8 COLLATE utf8_bin;
创建Confluence数据库用户(例如confluenceuser):
1 GRANT ALL PRIVILEGES ON <database-name>.* TO '<confluenceuser>'@'%' IDENTIFIED BY '<password>';
confluence镜像方面 https://hub.docker.com/r/cptactionhank/atlassian-confluence/dockerfile https://github.com/zhangguanzhang/Dockerfile/blob/master/atlassian-confluence
是市面上替换decoder那个jar的流程,路径为/opt/atlassian/confluence/confluence/WEB-INF/lib/atlassian-extras-decoder-api-3.4.1.jar。市面上是把安装完路径的jar拿出来用注册机打pathc后换回去
我在市面上下载的破解包里有个类似jira的破解jar文件atlassian-extras-3.2.jar,网上搜到了另一种破解思路是这个文件扔进去前删掉atlassian-extras*.jar,
这里找 https://mritd.me/ 漠然大佬帮我把注册机生成许可和打patch做成了不需要图形界面的cli工具用法是docker exec confluence atlassianctl license -s <id>即可获取许可证,官网申请的使用许可证不行,因为反编译的时候改了签名
1 2 3 4 5 6 7 8 9 10 11 12 13 14 15 16 17 18 19 20 21 version: '3.7' services: confluence: image: zhangguanzhang/atlassian-confluence:6.14.1 container_name: confluence hostname: confluence init: true volumes: - CONF_HOME_data:/var/atlassian/confluence - CONF_log_data:/opt/atlassian/confluence/logs - /etc/localtime:/etc/localtime:ro ports: - '8090:8090' logging: driver: json-file options: max-file: '3' max-size: 100m volumes: CONF_HOME_data: {} CONF_log_data: {}
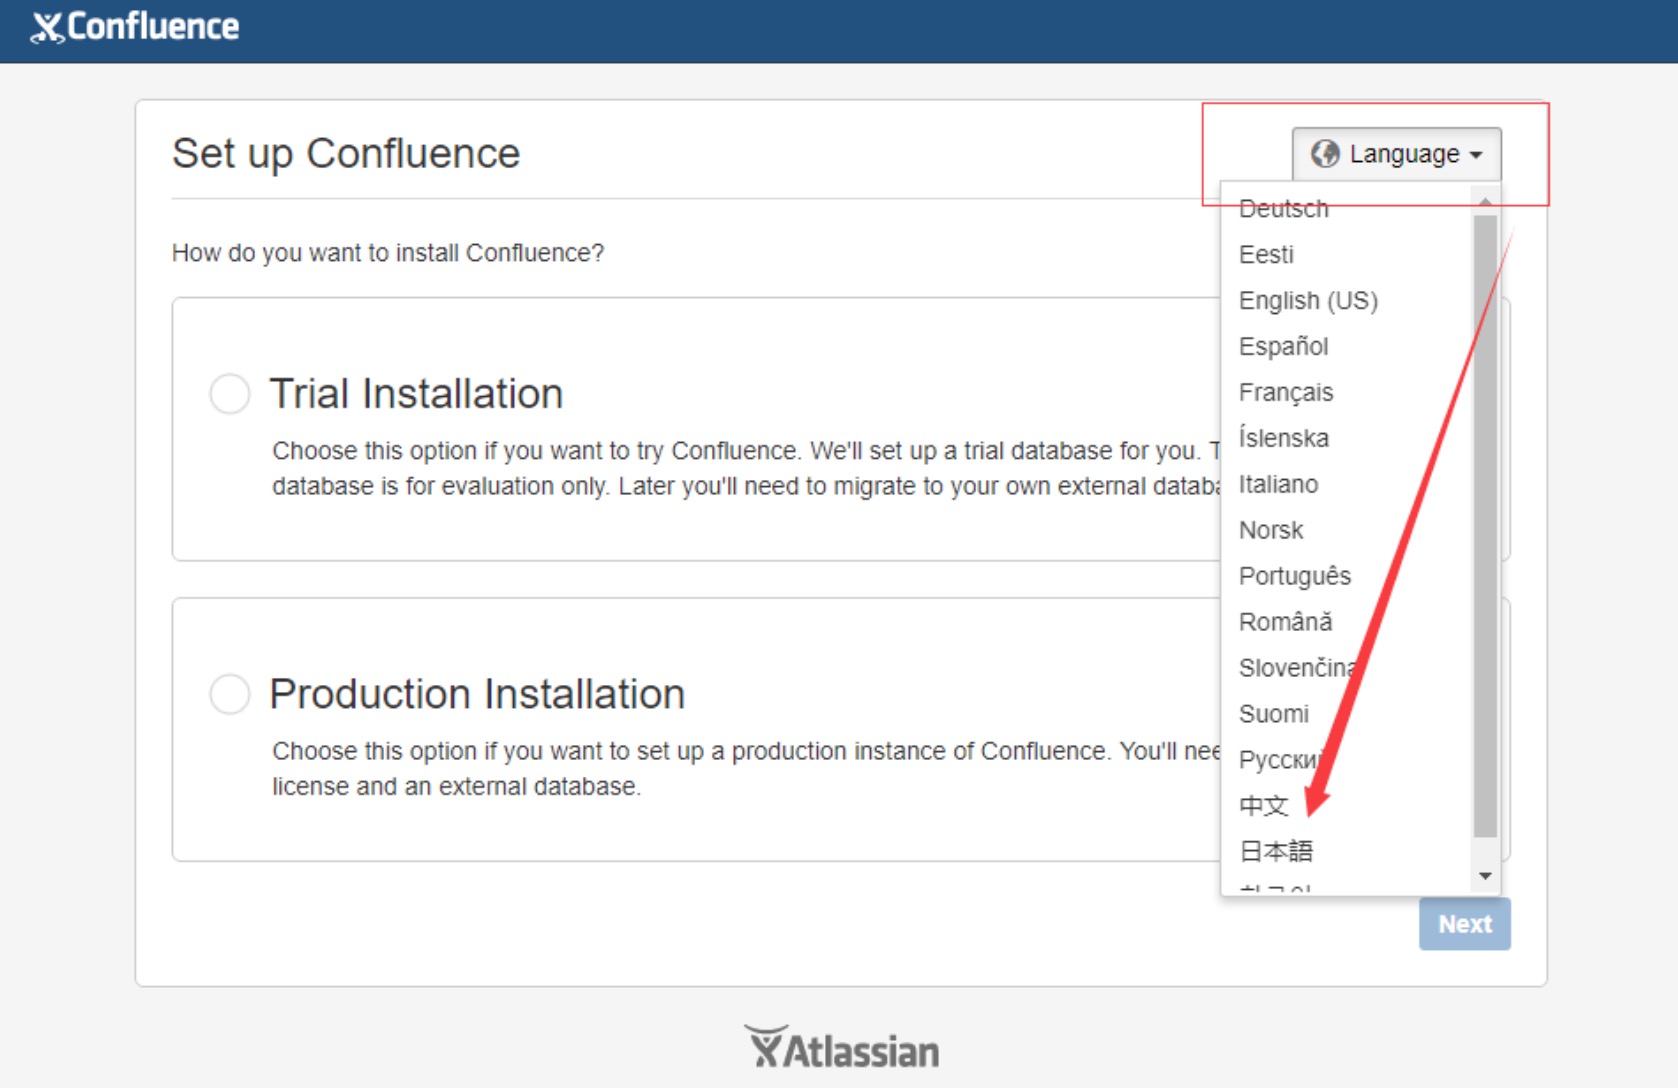
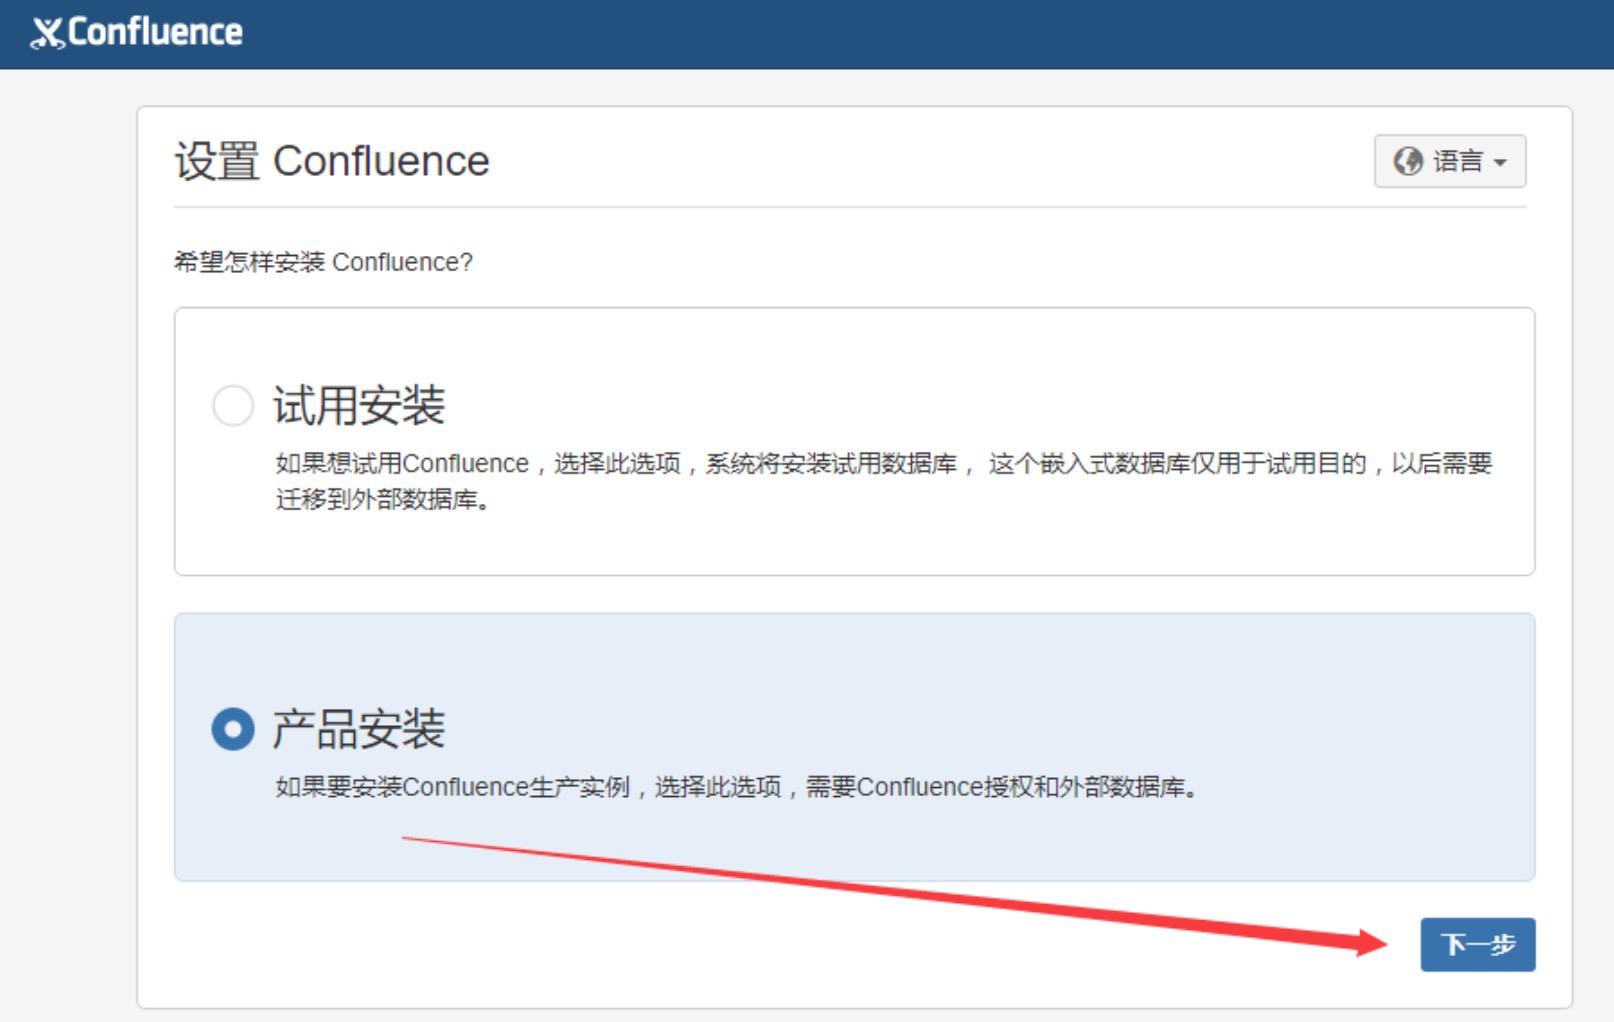
起来后访问ip:8090进到初次的页面设置
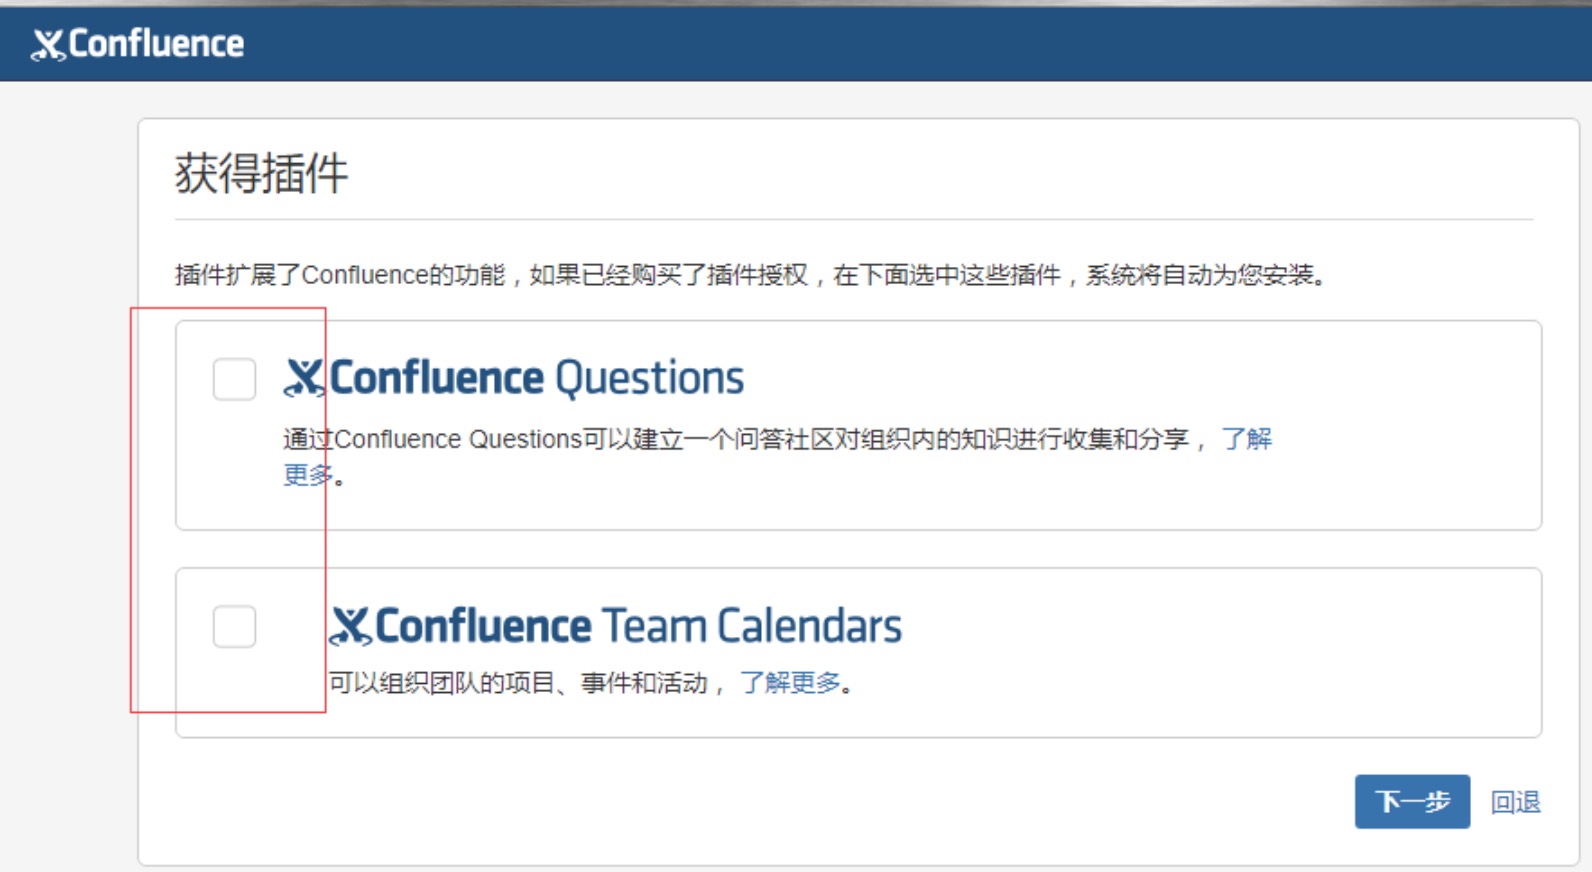
下面两个不要勾选
然后用命令生成注册码填进去即可
1 docker exec confluence atlassianctl license -s <id>
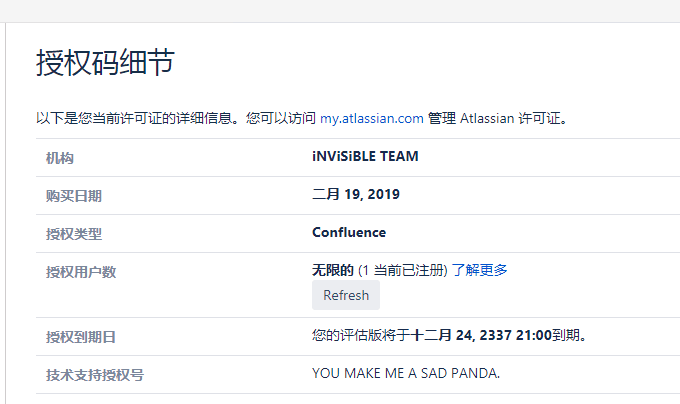
设置完后admin登陆进去后在在右上角的齿轮小图标里一般设置左侧栏里往下翻到授权细节查看如下图所示:/var/lib/docker/volumes/confluence_CONF_HOME_data/_data/confluence.cfg.xml
jdbc:mysql://10.20.4.17:3306/confluence改为jdbc:mysql://10.20.4.17:3306/confluence?useSSL=false改完后重启下容器即可
参考资料:https://www.cnblogs.com/kevingrace/p/7607442.html http://www.cnblogs.com/kevingrace/p/7608813.html https://blog.csdn.net/feifeiwang001/article/details/86607422 https://blog.csdn.net/alittleyatou/article/details/81506704 https://www.cnblogs.com/quanweiru/p/8118176.html https://confluence.atlassian.com/servicedeskserver/installing-jira-service-desk-939926011.html
